Jan
Types of Dog Leash Training Method

Types of Dog Leash Training Methods: How to Walk Your Dog Without Pulling

Walking your dog should be a fun, safe, and stress-free experience. But for many dog owners, leash pulling, lunging, or ignoring commands can turn walks into a struggle. The solution? Leash training.

There are several proven leash training methods, and the right one depends on your dog’s size, behavior, and training goals.

1. Loose-Leash Walking Method

Goal: Teach your dog to walk calmly without pulling.

How it Works:

  • Keep the leash loose, not tight

  • Stop walking immediately if the dog pulls

  • Resume walking only when the leash is slack

  • Reward your dog with treats or praise when walking calmly

Pros:

  • Encourages polite walking behavior

  • Builds a strong bond

  • Can be used with any dog

Cons:

  • Requires patience

  • Takes time for persistent pullers

Best for: Puppies, beginner dogs, everyday walks

2. Positive Reinforcement Method

Goal: Reinforce good walking behavior using rewards.

How it Works:

  • Use treats, toys, or praise when your dog walks without pulling

  • Reward frequently at first, gradually spacing rewards

  • Ignore bad behavior (no pulling) instead of punishing

Pros:

  • Builds trust and motivation

  • Works well with sensitive or nervous dogs

  • Strengthens obedience

Cons:

  • Requires consistency

  • Needs a supply of rewards

Best for: All dogs, especially sensitive or anxious dogs

3. Clicker Training Method

Goal: Use a clicker to mark the exact moment your dog behaves correctly on the leash.

How it Works:

  • Click when your dog walks calmly beside you

  • Follow immediately with a treat

  • Repeat consistently

Pros:

  • Highly precise

  • Reinforces correct behavior quickly

  • Combines well with positive reinforcement

Cons:

  • Requires a clicker and treats

  • Can confuse dogs if not consistent

Best for: Puppies and dogs that respond well to structured training

4. Stop-and-Go or “Red Light/Green Light” Method

Goal: Stop pulling by teaching the dog that pulling stops forward movement.

How it Works:

  • Stop walking as soon as your dog pulls

  • Stand still until the leash is slack

  • Resume walking only when the dog is calm

Pros:

  • Simple to implement

  • Works with strong pullers

  • Teaches immediate consequences

Cons:

  • Can frustrate impatient owners

  • Requires vigilance

Best for: Strong, large, or stubborn dogs

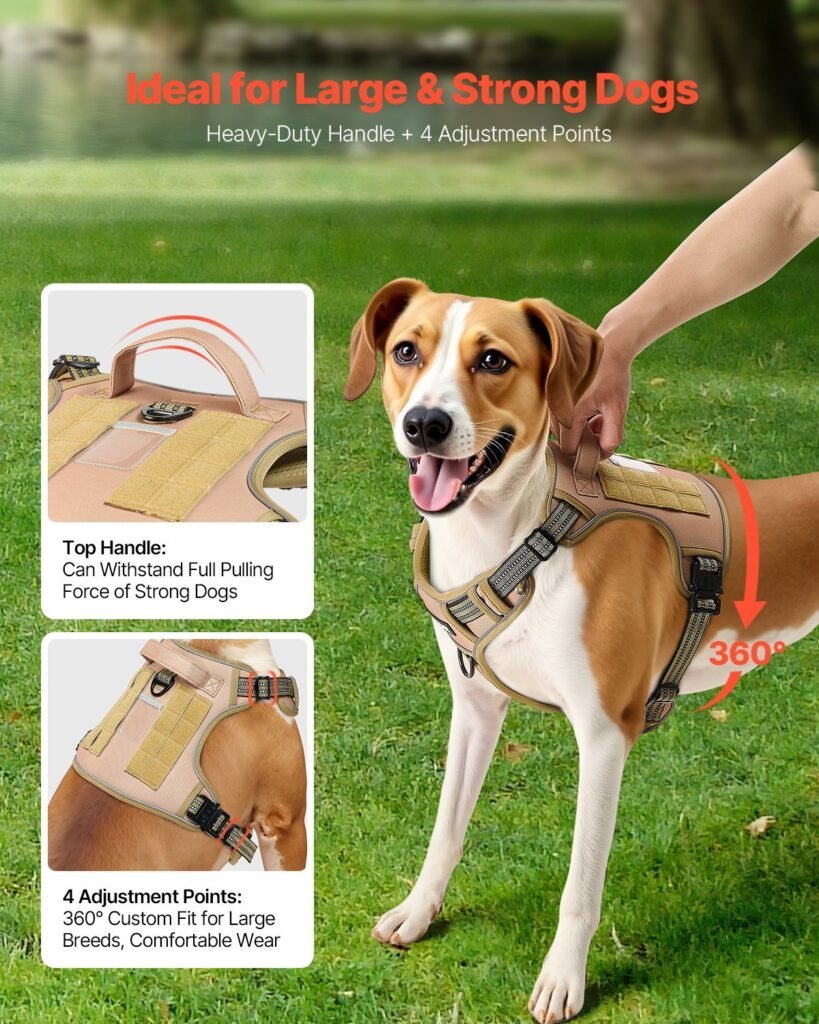
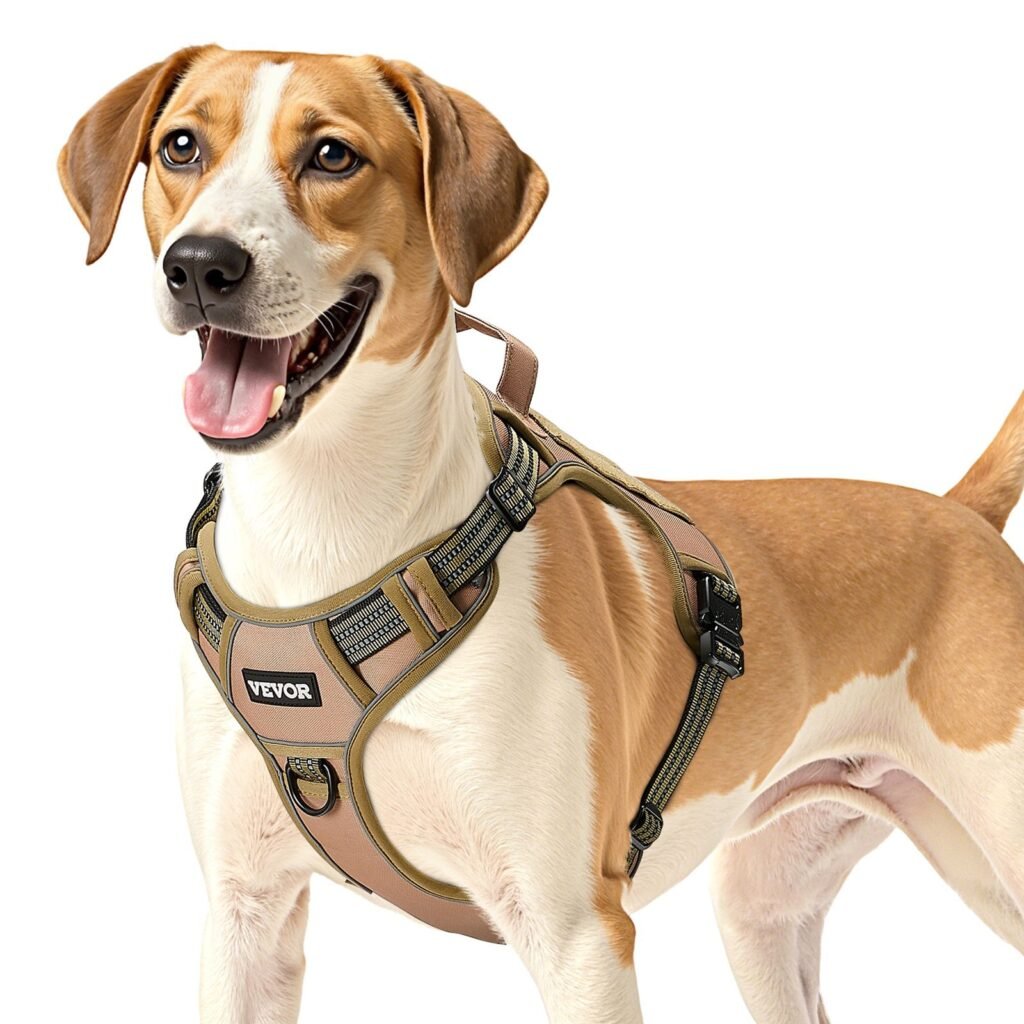
5. Front-Clip Harness Training Method

Goal: Reduce pulling by controlling the dog’s chest instead of neck.

How it Works:

  • Use a front-clip harness

  • When the dog pulls, the harness redirects them toward you

  • Reward slack leash walking

Pros:

  • Safer for dogs with neck or throat issues

  • Reduces pulling without force

  • Comfortable for long walks

Cons:

  • Requires proper harness fit

  • Not a standalone solution (combine with training)

Best for: Pullers, puppies, dogs with respiratory issues

6. Two-Step Training Method (Leash + Commands)

Goal: Combine leash control with verbal commands.

How it Works:

  • Use commands like “heel,” “easy,” or “stop”

  • Reinforce with leash pressure (gentle)

  • Reward calm walking

Pros:

  • Combines obedience and leash manners

  • Effective for advanced training

Cons:

  • Requires consistency

  • Needs owner skill and patience

Best for: Medium to large dogs, advanced walkers

Tips for Successful Leash Training

  1. Use the Right Equipment:

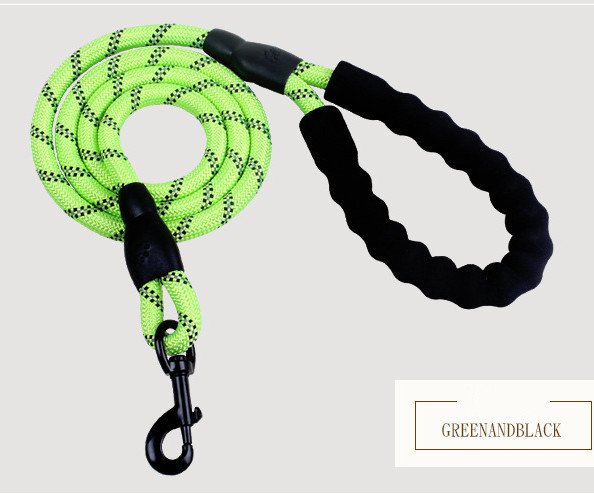
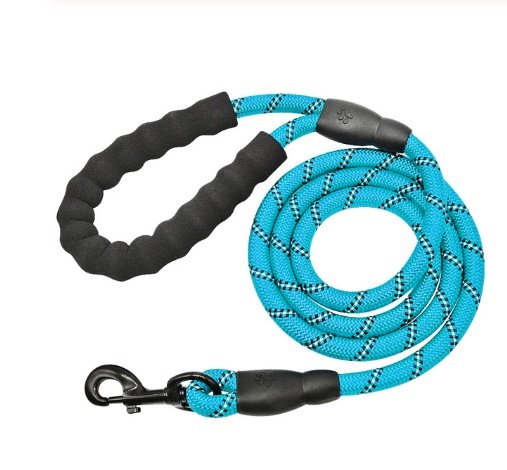
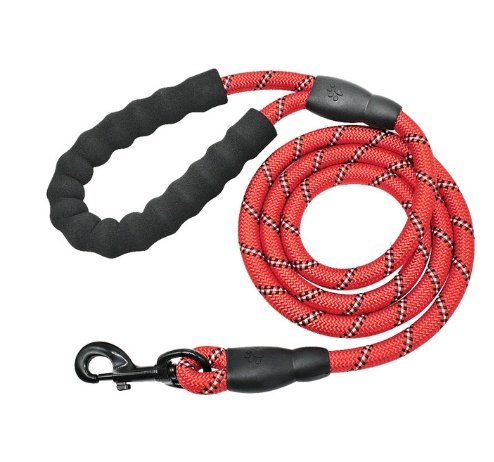
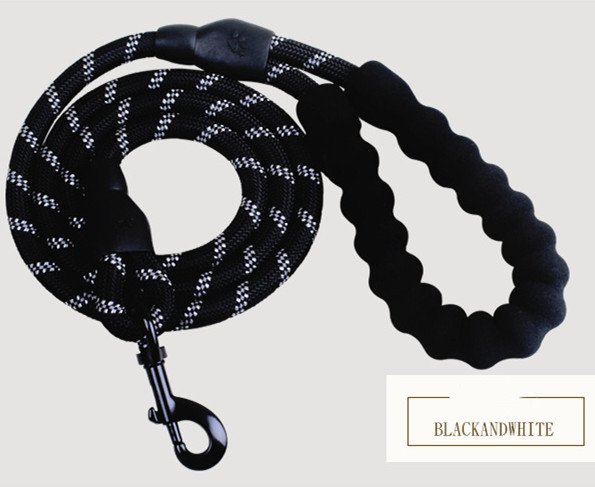
    • Standard leash (4–6 feet) is ideal

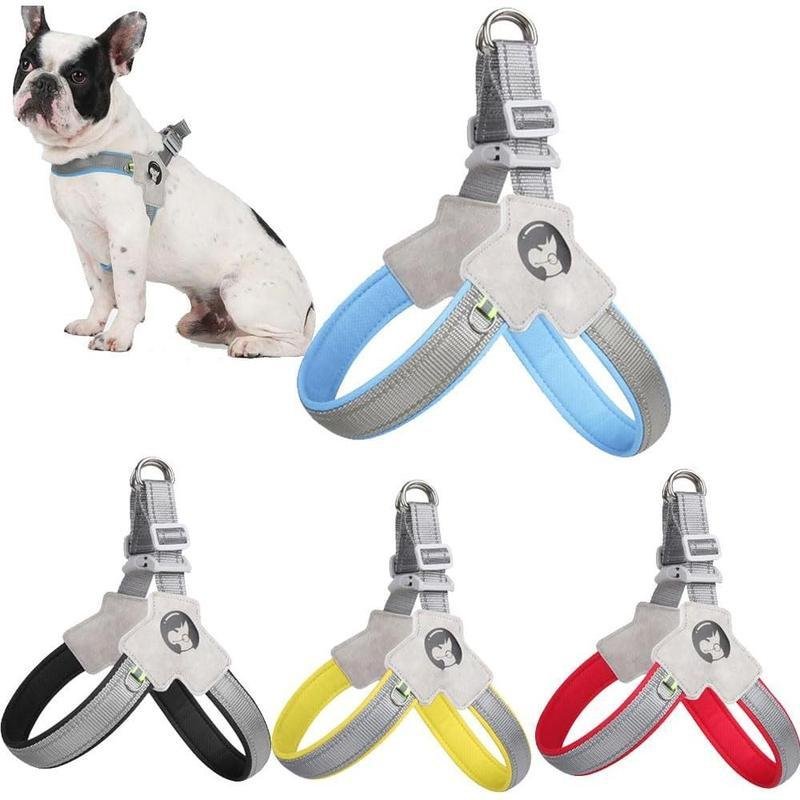
    • Consider a harness for pullers

  2. Keep Sessions Short and Frequent:

    • 5–10 minutes multiple times a day is more effective than long, exhausting walks

  3. Reward Calm Behavior:

    • Treats, praise, or toys work wonders

  4. Be Patient:

    • Leash training takes time; consistency is key

  5. Avoid Punishment:

    • Yanking, shouting, or harsh corrections can harm trust

Common Mistakes to Avoid

  • Letting pulling continue unchecked

  • Switching between methods inconsistently

  • Using equipment incorrectly (e.g., tight collars on pullers)

  • Expecting overnight results

Training MethodBest ForHow It WorksProsCons
Loose-Leash WalkingPuppies, beginner dogs, everyday walksKeep leash slack, stop when dog pulls, reward calm walkingBuilds polite walking habits, strengthens bond, works for all dogsRequires patience, can take time
Positive ReinforcementAll dogs, sensitive or anxious dogsReward good behavior with treats, toys, or praiseBuilds trust, motivates dogs, strengthens obedienceNeeds consistency, requires rewards
Clicker TrainingPuppies, dogs that respond well to structured trainingClick when dog behaves correctly, then rewardHighly precise, reinforces good behavior quicklyNeeds clicker and treats, requires consistency
Stop-and-Go / Red Light-Green LightStrong, large, or stubborn dogsStop walking when dog pulls, resume only when leash slackSimple to implement, teaches immediate consequenceCan frustrate impatient owners, requires vigilance
Front-Clip Harness TrainingPullers, puppies, dogs with neck or respiratory issuesHarness redirects pulling, reward slack leash walkingReduces pulling safely, comfortable for dogsRequires proper harness fit, not standalone
Two-Step (Leash + Commands)Medium-large dogs, advanced walkersCombine leash pressure with commands (“heel”, “easy”)Integrates obedience with leash control, effective for advanced dogsRequires skill, patience, consistency

Final Thoughts

Leash training isn’t just about control — it’s about communication, safety, and building trust. Using the right method for your dog’s personality and behavior ensures calmer walks, stronger bonds, and happier dogs.

Jan
Types of Dog Leashes

The Ultimate Dog Leash Buying Guide: How to Choose the Right Leash for Your Dog

Choosing the right dog leash is one of the most important decisions a dog owner makes — yet it’s often overlooked. A leash isn’t just something that connects you to your dog. It’s a safety tool, a training aid, and a daily essential that affects how enjoyable your walks are.

This guide breaks down everything you need to know about dog leashes, so you can confidently choose the best option for your dog and your lifestyle.

Why Choosing the Right Dog Leash Matters

The wrong leash can:

  • Make walking frustrating

  • Encourage pulling

  • Cause discomfort or injury

  • Reduce control in public spaces

The right leash:

  • Improves safety

  • Supports training

  • Feels comfortable in your hand

  • Makes walks calmer and more enjoyable

There’s no one-size-fits-all leash — the best choice depends on your dog.

The Main Types of Dog Leashes

Standard Dog Leash (Most Recommended)

Length: 4–6 feet
Best for: Everyday walks, training, most dogs

This is the most versatile and widely recommended leash type. It offers the best balance between freedom and control.

Why it works:

  • Ideal for sidewalks and public areas

  • Helps teach loose-leash walking

  • Works for puppies and adult dogs

For most dog owners, a standard 5–6 foot leash is the best place to start.

Retractable Dog Leash

Length: Up to 26 feet
Best for: Open areas, very well-trained dogs

Retractable leashes allow dogs to roam farther, but they come with trade-offs.

Pros:

  • Adjustable length

  • More freedom for dogs

Cons:

  • Less control

  • Can cause injuries

  • Encourages pulling

  • Not recommended for training

Trainer tip: Retractable leashes are rarely recommended for puppies or busy environments.

Training (Short) Leash

Length: 2–4 feet
Best for: Obedience training, heel work

Short leashes keep dogs close and focused, making them useful for structured training sessions.

Long Line Leash

Length: 10–50 feet
Best for: Recall training, open spaces

Long lines give dogs freedom while maintaining safety. These are training tools, not everyday walking leashes.

Hands-Free Dog Leash

Best for: Running, hiking, active owners

Hands-free leashes attach around your waist and are great for movement-based activities, but they’re not ideal for strong pullers.

Dog Leash vs Retractable Leash: Which Is Better?

For most dogs and owners, a standard leash is safer and more effective.

FeatureStandard LeashRetractable Leash
ControlHighLow
TrainingExcellentPoor
SafetySaferHigher risk
Public spacesIdealNot recommended

If you’re unsure, choose a standard leash.

Best Dog Leashes for Puppies

Puppies are still learning how to walk calmly on a leash.

Best puppy leash features:

  • Lightweight

  • 4–6 feet long

  • Comfortable handle

Recommended setup:
✔ Standard leash + harness

Avoid for puppies:

  • Retractable leashes

  • Heavy chain leashes

  • Long lines in public areas

Best Dog Leashes for Dogs That Pull

If your dog pulls, the leash should prioritize control and durability.

What to look for:

  • Strong material (nylon, rope, or leather)

  • Heavy-duty metal clip

  • Comfortable, non-slip handle

Best combination:
✔ Standard leash + front-clip harness

Avoid retractable leashes — they make pulling worse.

How to Choose the Right Leash Length

  • 2–4 feet: Training and heel work

  • 4–6 feet: Best for everyday walking

  • 8–10+ feet: Training only

Most dog owners should choose a 6-foot leash.

Dog Leash Materials Explained

Nylon

  • Lightweight and affordable

  • Can cause friction burns if your dog pulls

Leather

  • Durable and comfortable

  • Softens with use

  • Long-lasting

Rope

  • Strong and flexible

  • Comfortable grip

  • Great for medium to large dogs

Chain

  • Chew-proof

  • Heavy and uncomfortable

  • Not ideal for daily walking

Common Dog Leash Mistakes

  • Choosing based on looks instead of function

  • Using retractable leashes for training

  • Using leashes that are too long in public

  • Ignoring handle comfort

  • Using weak clips for strong dogs

Quick Buying Guide: Which Leash Is Right for You?

If you want one leash that works for almost everything:
→ Standard 5–6 foot leash

If you have a puppy:
→ Lightweight standard leash + harness

If your dog pulls:
→ Heavy-duty standard leash + front-clip harness

If you run or hike:
→ Hands-free leash (for trained dogs)

Final Thoughts

A dog leash is something you’ll use every single day. Choosing the right one makes walking safer, easier, and more enjoyable for both you and your dog.

If you’re ever unsure, keep it simple:
A well-made standard leash is the best choice for most dogs and most situations.


Jan
Dog leash vs dog harness

Dog Leash vs Dog Harness: What’s the Difference and Which Is Better?

When walking a dog, many people ask the same question: Should I use a dog leash or a dog harness?
The truth is, they’re not opposites — they work together, but they serve different purposes.

Understanding the difference helps you choose the safest and most comfortable setup for your dog.

What Is a Dog Leash?

A dog leash is the line that connects you to your dog. It gives you control, keeps your dog safe, and allows you to guide their movement during walks.

What a Leash Does

  • Keeps your dog close and under control

  • Prevents running into traffic or unsafe areas

  • Helps with training and communication

  • Required by law in many public places

A leash always attaches to something — either a collar or a harness.

What Is a Dog Harness?

A dog harness is worn on the dog’s body and distributes pressure across the chest and shoulders instead of the neck.

What a Harness Does

  • Reduces strain on the neck and throat

  • Provides better control for strong or pulling dogs

  • Improves comfort during walks

  • Helps prevent choking or injury

Harnesses are especially useful for dogs that pull, small dogs, puppies, or dogs with medical issues.

Key Differences at a Glance

FeatureDog LeashDog Harness
PurposeControl and guidanceComfort and pressure distribution
Worn byHandlerDog
Prevents pullingNo (by itself)Helps, especially front-clip
Neck pressureDepends on attachmentMinimal
Required for walksYesOptional but recommended

Collar + Leash vs Harness + Leash

Collar and Leash

Best for:

  • Dogs that walk calmly

  • Trained dogs with good leash manners

  • Short, controlled walks

Risks:

  • Neck strain if the dog pulls

  • Not ideal for small dogs or pullers

Harness and Leash

Best for:

  • Dogs that pull

  • Puppies learning leash manners

  • Small dogs or flat-faced breeds

  • Dogs with neck, throat, or breathing issues

Benefits:

  • Safer and more comfortable

  • Better control without choking

  • Encourages better walking behavior

Front-Clip vs Back-Clip Harness (Important Difference)

Front-Clip Harness

  • Leash attaches at the chest

  • Helps reduce pulling by turning the dog slightly

  • Best for training and strong pullers

Back-Clip Harness

  • Leash attaches on the back

  • Comfortable for relaxed walking

  • Not ideal for dogs that pull

Which Is Better: Dog Leash or Dog Harness?

The Honest Answer:

You need both.

  • The leash gives you control and keeps your dog safe

  • The harness protects your dog’s body and improves comfort

A leash without a harness can strain the neck.
A harness without a leash offers no control.

What Most Trainers Recommend

For most dogs, especially beginners:

  • Harness + standard leash is the safest setup

For trained dogs with good manners:

  • Collar + leash can work fine

For pullers or large dogs:

  • Front-clip harness + leash is best

Common Myths

Myth: Harnesses encourage pulling
→ False. Poor training causes pulling, not harnesses.

Myth: Leashes alone are enough
→ Not for dogs that pull or have neck sensitivity.

Myth: Small dogs don’t need harnesses
→ Small dogs are actually more prone to neck injuries.

Final Thoughts

A dog leash and a dog harness aren’t competitors — they’re partners. The right combination depends on your dog’s size, behavior, and walking habits. If safety and comfort matter to you, a harness paired with a quality leash is hard to beat.


Jan
how to make a dog leash from paracord

How to Make a Dog Leash from Paracord (Ultimate DIY Guide)

Making your own dog leash from paracord is fun, affordable, and functional. Paracord is strong, lightweight, and comfortable, and when paired with good hardware, it can create a leash that lasts for years.

This guide covers:

  • Materials you need

  • Choosing the right leash length

  • Strength considerations for small, medium, and large dogs

  • Different weaving patterns

  • Step-by-step instructions (including handle)

  • Optional add-ons

  • Matching paracord collar

  • Material calculator

  • Common mistakes and care

Why a Paracord Leash?

Paracord is durable and rated to hold hundreds of pounds. When properly woven and paired with a strong clip, it’s perfect for DIY leashes.

Pros:

  • Custom length and color

  • Lightweight but strong

  • Easy to clean

  • Comfortable to grip

Cons:

  • Not ideal for extremely strong or aggressive pullers unless reinforced

  • Knots must be tight and ends sealed

Materials Needed

  • 550 paracord (Type III) – approximately 8–10 feet per 1 foot of leash (depending on pattern)

  • Heavy-duty swivel snap hook – rated for your dog’s weight

  • Scissors

  • Lighter – for melting ends

  • Optional: tape or clamp to hold paracord while weaving

  • Optional: D-ring for waste bags or keys

Choosing Leash Length

Common leash lengths:

  • 4 feet – tight control and training

  • 5–6 feet – everyday walking

  • 8–10 feet – long-line training (not typical for daily walks)

Tip: Longer leash = more paracord needed and more knots to weave.

Choosing the Right Paracord Thickness

Dog SizeRecommended ParacordNotes
Small (<20 lbs)425–550 Type IIILightweight, easy to grip
Medium (20–50 lbs)550 Type IIIStandard, strong, comfortable
Large (>50 lbs)550 Type III or double braidUse two cords or thicker weave for strong pullers

Hardware matters: Always use a metal snap hook rated above your dog’s weight.

Step 1: Attach Paracord to Clip

  1. Fold paracord in half.

  2. Slide loop through snap hook eye.

  3. Pull loose ends through the loop (lark’s head knot).

  4. Tighten securely.

This is the leash’s anchor point.

Step 2: Choose Your Weave

Cobra Stitch (Solomon Bar) – Beginner-Friendly

  • Strong, durable, comfortable

  • Easy to learn

King Cobra (Double Cobra)

  • Twice as thick, extra strong

  • Ideal for large or strong pullers

Fishtail Braid

  • Slim, flexible

  • Good for style and light to medium dogs

Diamond Braid

  • Decorative and strong

  • Slightly more advanced

Step 3: Start the Weave

  1. Spread the two working cords over the core strands.

  2. Make alternating knots down the leash (cobra stitch or chosen pattern).

  3. Keep tension even.

  4. Stop occasionally to straighten the leash.

Tip: Consistent tight knots = durability and comfort.

Step 4: Make the Handle Loop

  1. Bend the leash back to form a loop (6–8 inches standard).

  2. Continue the weave over both cords for 2–3 inches to secure handle.

  3. Make sure it’s snug and comfortable for your hand.

Step 5: Finish and Seal Ends

  1. Trim any leftover cords.

  2. Melt ends with lighter carefully.

  3. Press melted ends flat (use metal or lighter body, not fingers).

Sealing prevents fraying.

Optional Add-Ons

  • D-ring near handle – attach waste bags, keys, or small items

  • Reflective paracord – for nighttime walks

  • Two-color weave – stylish or color-coded

  • Wrist loop instead of full handle – extra control

  • Double weave for strength – ideal for large pullers

Making a Matching Paracord Collar

  • Measure your dog’s neck plus 1–2 inches for comfort.

  • Use the same paracord and weave pattern as the leash.

  • Attach with a heavy-duty buckle or O-ring.

  • Optional: Add ID tag ring.

Matching leash + collar = professional look and durability.

Material Calculator

Example: For a 6-foot leash using a cobra weave:

  • 6 feet x 8–10 feet per foot = 48–60 feet paracord

  • Add extra 5–10 feet for handle, finishing, and mistakes

  • Total: ~55–70 feet paracord for a 6-foot leash

Adjust if using double weave or thicker patterns.

Common Mistakes to Avoid

  • Using weak hardware

  • Leaving knots loose

  • Not sealing ends

  • Making leash too thin for strong dogs

  • Skipping test for strength

Test your leash gently before first real walk.

Care & Maintenance

  • Hand wash in mild soap, air dry

  • Check knots and clip regularly

  • Replace leash if fraying or hardware shows wear


Final Thoughts

A paracord dog leash is strong, customizable, and fun to make. When paired with heavy-duty hardware and woven tightly, it’s safe for everyday walking. A matching collar takes it to the next level, creating a durable, stylish set for your dog.


Jan
how to train your dog off leash

How to Train Your Dog Off Leash (Safely and Successfully)

Off-leash training isn’t about letting your dog do whatever they want. It’s about teaching reliable control, focus, and trust without a physical connection. A truly off-leash-trained dog listens the first time, even with distractions.

This guide explains when off-leash training is appropriate, how to build it step by step, and how to avoid the most common mistakes.

First: Is Your Dog Ready for Off-Leash Training?

Not every dog is ready — and that’s okay.

Your dog should already:

  • Respond reliably to their name

  • Come when called on a leash

  • Walk politely on a loose leash

  • Stay calm around people and dogs

  • Show no aggression or strong prey drive

If these aren’t solid yet, work on them first. Off-leash freedom is earned.

Safety Comes First

Before you start:

  • Follow local leash laws

  • Avoid roads, parking lots, and unfenced areas

  • Start in fully enclosed spaces

  • Never trust off-leash skills near traffic

Off-leash training is about control, not risk.

What You’ll Need

  • A long line (15–30 feet)

  • High-value treats

  • A calm training environment

  • Patience and consistency

A long line lets your dog feel free while still being safe.

Step 1: Build a Rock-Solid Recall

Recall (“come”) is the most important off-leash skill.

How to Train Recall

  1. Start indoors or in a fenced area

  2. Say your dog’s name once

  3. Say “come” in a calm, confident voice

  4. Reward immediately when your dog reaches you

  5. Release them back to exploring

Never call your dog for punishment or to end fun every time.

Step 2: Use a Long Line Outdoors

Attach a long line and move to a quiet outdoor space.

  • Let your dog explore

  • Call them back randomly

  • Reward heavily every time

  • If they ignore you, gently reel them in (no jerking)

This teaches your dog that coming back is not optional, but still positive.

Step 3: Teach Check-Ins

Off-leash dogs should check in with their handler naturally.

  • Reward your dog for looking at you on their own

  • Praise calm attention

  • Occasionally change direction

Your dog should learn: paying attention keeps freedom going.

Step 4: Add Distance and Distractions Slowly

Only increase one thing at a time:

  • More distance or

  • More distractions or

  • More freedom

If your dog struggles, go back a step. That’s progress, not failure.

Step 5: Practice Emergency Recall

Teach a special recall word used only in emergencies (like “NOW” or a whistle).

  • Use the highest value rewards

  • Practice rarely

  • Always reward heavily

This cue should mean drop everything and come immediately.

When to Remove the Long Line

Only remove it when your dog:

  • Responds immediately 9 out of 10 times

  • Recalls around mild distractions

  • Checks in regularly

  • Shows no tendency to bolt

Start without the line in fenced areas only.

Common Mistakes to Avoid

  • Skipping leash training first

  • Trusting recall too early

  • Calling repeatedly

  • Chasing your dog

  • Letting failures slide

  • Training near traffic

Off-leash reliability is built, not assumed.

Special Considerations

Puppies

  • Focus on recall and attention

  • Keep sessions short

  • Use fenced areas only

  • Never expect perfection

High-Prey-Drive Dogs

  • Be realistic

  • Use long lines longer

  • Avoid wildlife areas

  • Some dogs may never be fully off-leash safe

Rescue Dogs

  • Take extra time building trust

  • Expect setbacks

  • Train in secure areas first

Off-Leash Training Checklist

Before allowing off-leash freedom:

  • Reliable recall

  • Calm around distractions

  • Long-line success

  • Legal location

  • Safe environment

If any box is unchecked, keep training.

FAQs

How long does off-leash training take?
Weeks to months. Reliability takes time.

Can all dogs be trained off leash?
Most can improve, but not all dogs are safe off leash in all environments.

Is off-leash training safe?
Yes — when done gradually, legally, and in appropriate locations.

What if my dog ignores me?
Go back to the long line and reduce distractions.

Final Thoughts

Off-leash training is about trust, communication, and responsibility. A dog that earns off-leash freedom is a joy to walk — but safety always comes first. Take your time, train consistently, and never rush the process.


Jan
do service dogs have to be on a leash

Do Service Dogs Have to Be on a Leash? (Complete Legal Guide)

Short answer:

Yes, service dogs are generally required to be on a leash, harness, or tether — with specific legal exceptions.

What matters most under the law is control, not the leash itself.

U.S. Law: What the ADA Requires

In the United States, service dogs are protected under the Americans with Disabilities Act (ADA).

The ADA rule is simple:

A service dog must be leashed, harnessed, or tethered unless:

  1. The leash interferes with the dog’s trained work, or

  2. The handler’s disability prevents them from using a leash

If either applies, the dog does not have to be on a leash, but must still be under the handler’s control at all times using:

  • Voice commands

  • Hand signals

  • Other effective means

A dog that is not under control is not protected, leash or no leash.

Exact ADA Language (Plain English)

The ADA states that service animals must be under the handler’s control and typically use a leash, harness, or tether unless those devices interfere with the service animal’s work or the handler’s disability prevents their use.

This wording is important because it:

  • Protects legitimate off-leash service work

  • Prevents misuse by uncontrolled animals

  • Focuses on behavior, not equipment

When a Service Dog May Legally Be Off-Leash

A service dog may be off-leash only when necessary to perform trained tasks.

Common examples include:

  • Mobility service dogs that need space to brace or assist with balance

  • Medical alert dogs that must move quickly to get help

  • Psychiatric service dogs trained to create space or interrupt behaviors

  • Handlers with physical limitations who cannot hold a leash

Even in these cases, the dog must respond immediately to commands.

When a Service Dog Should Be Leashed

A service dog should be leashed when:

  • The leash does not interfere with its task

  • The handler can safely use one

  • The dog is in public spaces like stores, sidewalks, airports, or restaurants

This is why most service dogs you see in public are leashed — not because it’s always required, but because it’s usually practical.

Can Businesses Require a Leash?

No — not in all cases.

A business cannot legally require a leash if:

  • The leash interferes with the dog’s trained tasks, or

  • The handler’s disability prevents leash use

However, a business can require control.

If a service dog is:

  • Barking repeatedly

  • Lunging at people

  • Wandering or ignoring commands

…and the handler does not correct it, the business may ask the dog to leave, even if it is a real service dog.

What Businesses ARE Allowed to Ask (U.S.)

Businesses may ask only two questions if a service dog’s status is unclear:

  1. “Is the dog a service animal required because of a disability?”

  2. “What work or task has the dog been trained to perform?”

They cannot:

  • Ask about the handler’s disability

  • Demand documentation or ID

  • Require a vest or certification

  • Ask the dog to demonstrate tasks

Service Dogs vs. Emotional Support Animals (Very Important)

Service Dogs

✔ Trained to perform specific tasks
✔ Protected under the ADA
✔ Allowed in public places
✔ May be off-leash if required for tasks

Emotional Support Animals (ESAs)

✘ Not trained to perform tasks
✘ Not protected under the ADA
✘ No public access rights
✘ Do not qualify as service animals

ESAs may have housing protections under other laws, but they are not service dogs.

Common Myths (Cleared Up)

Myth: Service dogs must always be leashed
→ False. There are legal exceptions.

Myth: Off-leash means the dog is fake
→ False. Some tasks require off-leash work.

Myth: Service dogs must wear vests or ID
→ False. No vest or registration is required.

Myth: Businesses can deny access if a dog isn’t leashed
→ False, if the leash interferes with tasks and the dog is controlled.

What “Under Control” Actually Means

A service dog is under control when it:

  • Responds immediately to commands

  • Stays focused on its handler

  • Does not disturb others

  • Does not pose a safety risk

A leash alone does not equal control.

How This Differs Outside the United States

Canada

  • Laws vary by province

  • Most require service dogs to be under control

  • Leash rules depend on local regulations

United Kingdom

  • Assistance dogs are usually expected to be leashed

  • Exceptions exist for task-related needs

  • Access rights are protected under the Equality Act

European Union

  • Rules vary widely by country

  • Many require visible identification

  • Leash requirements differ

If traveling internationally, always check local laws.

Bottom Line

  • ✔ Service dogs are usually leashed

  • ✔ A leash is not required if it interferes with trained tasks

  • ✔ Control is always required

  • ✔ Businesses cannot deny access solely because a dog is off-leash

  • ✔ ESAs are not service dogs


Jan
how to stop dog from pulling on leash

How to Stop a Dog From Pulling on the Leash (Complete Training Guide)

Leash pulling is one of the most common frustrations dog owners face. Walks turn into tug-of-war, arms get sore, and what should be relaxing becomes stressful. The truth is, most dogs pull simply because they’ve never been taught how not to.

This guide explains why dogs pull, how to stop it step by step, and how to adapt the training for puppies, large dogs, and difficult cases — without harsh tools or force.

Why Dogs Pull on the Leash

Pulling is normal dog behavior, not disobedience.

Dogs pull because:

  • They naturally walk faster than humans

  • They’re excited by smells, people, or other dogs

  • Pulling has worked in the past

  • They don’t understand leash pressure

Dogs repeat behaviors that get results. If pulling moves them forward, they’ll keep doing it.

What You Need to Stop Leash Pulling

You don’t need complicated tools — just the right basics.

  • A 4–6 foot standard leash

  • A well-fitted harness (front-clip recommended for pullers)

  • High-value treats (chicken, cheese, or soft training treats)

  • Time, patience, and consistency

Avoid retractable leashes during training. They teach dogs to pull.

The Golden Rule of Loose-Leash Walking

If the leash is tight, you stop.
If the leash is loose, you move.

This single rule teaches your dog everything they need to know.

Step-by-Step Training Method (Loose-Leash Walking)

Step 1: Start Where Your Dog Can Succeed

Begin indoors or in a quiet area. Busy streets are too distracting early on.

Step 2: Reward the Loose Leash

  • Stand still with your dog on leash

  • The moment the leash relaxes, reward

  • Take one or two steps forward

  • Reward again if the leash stays loose

You’re showing your dog exactly what behavior earns rewards.

Step 3: Stop Immediately When Pulling Starts

When your dog pulls:

  • Stop walking

  • Stay calm and silent

  • Wait for the leash to loosen

  • Reward and continue

Do not yank the leash or scold. Stillness is the correction.

Step 4: Change Direction When Needed

If pulling continues:

  • Calmly turn and walk the other way

  • Reward when your dog catches up

This keeps your dog focused on you instead of the environment.

Step 5: Add a Walking Cue

Use a simple cue like:

  • “Let’s go”

  • “Walk”

  • “With me”

Say it just before moving so your dog learns its meaning.

Use the Environment as a Reward

Sniffing, greeting, and exploring are powerful rewards.

  • Loose leash = access to the environment

  • Pulling = everything stops

This makes training faster and more natural.

7-Day Loose-Leash Training Plan

Day 1–2:
Practice indoors, 5–10 minutes
Reward every loose step

Day 3–4:
Move to yard or driveway
Introduce direction changes

Day 5–6:
Quiet sidewalk
Increase walking distance

Day 7:
Add mild distractions
Return to easier areas if needed

Repeat weeks as needed — progress is not linear.

Puppy-Specific Tips

Puppies are learning habits that last a lifetime.

  • Keep walks short and positive

  • Reward frequently

  • Don’t expect perfection

  • Let them explore on a loose leash

Never allow consistent pulling — even in puppies.

Tips for Large or Strong Dogs

Strength doesn’t mean harder training — it means clearer rules.

  • Use a front-clip harness

  • Train indoors first

  • Stop immediately when pulling starts

  • Be consistent every single walk

Proper technique beats strength every time.

For Easily Distracted or Reactive Dogs

  • Increase distance from triggers

  • Reward calm behavior heavily

  • Practice focus games at home

  • Move at your dog’s pace

If needed, consult a professional trainer for reactivity.

Equipment: What Helps and What Hurts

Helpful

  • Front-clip harness

  • Standard leash

  • Treat pouch

Avoid

  • Retractable leashes

  • Choke chains

  • Prong collars

  • Leash jerks

Tools don’t replace training — they only support it.

Common Mistakes That Slow Progress

  • Letting your dog pull “sometimes”

  • Training only when in a hurry

  • Starting in busy areas too soon

  • Expecting fast results

  • Inconsistency between handlers

Dogs learn patterns, not exceptions.

FAQs

How long does it take to stop leash pulling?

Most dogs show improvement within 2–4 weeks of consistent training. Strong pullers may take longer.

Should I stop walks until my dog stops pulling?

No. Walks are important. Just turn them into training sessions.

Is pulling a sign of dominance?

No. Pulling is excitement, habit, or lack of training — not dominance.

Can older dogs learn not to pull?

Absolutely. Age does not prevent learning.

What if my dog pulls toward other dogs?

Increase distance, stop walking, and reward calm attention back to you.

Quick Checklist Before Every Walk

  • Harness fitted correctly

  • Leash attached securely

  • Treats ready

  • Calm mindset

  • Consistent rules

Final Thoughts

Stopping leash pulling isn’t about control or force — it’s about teaching your dog how to succeed. When pulling no longer works and calm walking always does, behavior changes naturally.

Stay patient, stay consistent, and remember: every loose step is progress.


Jan
how to put a body leash on a dog

How to Put a Body Leash on a Dog (Complete Guide)

A body leash, also called a dog harness, is one of the safest and most comfortable ways to walk a dog. When used correctly, it gives you better control without putting pressure on your dog’s neck. The key is choosing the right harness and putting it on the right way.

This guide covers everything you need to know, step by step.

How to Choose the Right Harness Size

A harness that doesn’t fit properly can cause rubbing, slipping, or restricted movement.

Measure Your Dog

Use a soft measuring tape and measure:

  • Chest (girth): Around the widest part of the ribcage, just behind the front legs

  • Neck (if required): Around the base of the neck, not high like a collar

Always choose a size based on chest measurement first, not weight or breed.

Fit Rules

A proper fit should:

  • Sit low across the chest, not on the throat

  • Allow full shoulder movement

  • Stay in place without shifting

  • Allow two fingers to fit between the harness and your dog

If your dog is between sizes, choose the larger size and adjust down.

Types of Body Leashes (Harness Styles)

Over-the-Head Harness

  • Slips over the head

  • Buckles around the chest

  • Common and secure

  • Best for dogs comfortable being handled

Step-In Harness

  • Dog steps into two loops

  • Buckles across the back

  • Good for dogs that dislike things going over their head

Front-Clip Harness

  • Leash attaches at the chest

  • Helps reduce pulling

  • Often includes a back clip as well

How to Put on an Over-the-Head Harness

  1. Unbuckle the harness completely

  2. Hold the neck opening and gently slip it over your dog’s head

  3. Position the chest strap across the chest (not the neck)

  4. Bring the straps under the belly

  5. Buckle both sides behind the front legs

  6. Adjust straps evenly

Check that nothing is twisted and the harness lies flat.

How to Put on a Step-In Harness

  1. Lay the harness flat on the ground

  2. Place one front paw into each loop

  3. Lift the harness up around the chest

  4. Buckle it across the back

  5. Adjust the straps for a snug fit

Make sure the straps do not rub the armpits.

Front-Clip vs Back-Clip: Which Should You Use?

Front-Clip Harness

Best for:

  • Dogs that pull

  • Training loose-leash walking

  • Large or strong dogs

How it helps:
When the dog pulls, their body gently turns back toward you, reducing forward momentum.

Back-Clip Harness

Best for:

  • Calm walkers

  • Small dogs

  • Everyday casual walks

More comfortable for dogs who already walk well on a leash.

Many harnesses include both clips, which gives you flexibility.

How to Attach the Leash

  • Clip the leash to the back ring for relaxed walking

  • Use the front ring for training or pulling issues

  • Always check the clip before leaving

Never attach the leash before confirming the harness is fitted correctly.

Tips for Puppies

  • Choose an adjustable harness they can grow into

  • Keep sessions short and positive

  • Let the puppy wear the harness indoors first

  • Use treats and praise every time it goes on

Avoid leaving the harness on unsupervised puppies.

Tips for Large or Strong Dogs

  • Use a sturdy, well-padded harness

  • Front-clip harnesses offer better control

  • Make sure buckles and stitching are heavy-duty

  • Check fit often, especially during growth or weight changes

Proper fit is especially important to prevent slipping out.

Common Mistakes to Avoid

  • Putting the harness on backward

  • Leaving straps twisted

  • Fitting it too loose (dogs can escape)

  • Fitting it too tight (causes discomfort)

  • Letting the chest strap sit against the throat

Quick Checklist Before Every Walk

  • Harness lying flat and centered

  • Chest strap sitting low

  • Two fingers fit under straps

  • Leash securely clipped

  • No rubbing under the arms

Final Thoughts

A body leash should make walking easier, not harder. When fitted correctly, a harness keeps your dog comfortable, secure, and easier to guide. Take your time the first few times, make adjustments as needed, and soon it will feel routine for both of you.


Jan
how to leash train a dog

How to Leash Train a Dog (Step-by-Step Guide That Actually Works)

Leash training is one of the most important skills a dog can learn. It keeps your dog safe, makes walks enjoyable, and prevents common problems like pulling, lunging, or constant stopping. The good news is that leash training doesn’t require force or special tricks — it requires patience, consistency, and the right approach.

This guide walks you through exactly how to leash train a dog, whether you’re working with a puppy or an adult dog who has never learned proper leash manners.

Why Leash Training Is Important

A dog that walks calmly on a leash is safer and easier to manage. Good leash training:

  • Reduces the risk of accidents near roads or other dogs

  • Prevents strain and injury caused by constant pulling

  • Makes daily walks relaxing instead of frustrating

  • Helps your dog focus on you, even in distracting environments

Leash training is not about controlling your dog — it’s about teaching them how to move with you.

What You Need Before You Start

Keep things simple. You don’t need fancy equipment.

  • A standard leash (4–6 feet is ideal for training)

  • A comfortable harness (front-clip harnesses are especially helpful for dogs that pull)

  • Small, high-value treats (soft and easy to eat quickly)

  • A quiet place to practice (indoors or in a calm yard)

Avoid retractable leashes during training. They encourage pulling and make it harder for your dog to understand boundaries.

Step 1: Help Your Dog Feel Comfortable With the Leash

Before you ever go for a walk, make sure the leash and harness feel normal to your dog.

  • Let your dog sniff the leash and harness

  • Give treats while putting the harness on

  • Clip the leash on and let your dog move around indoors for a few minutes

The goal is for your dog to associate the leash with positive experiences, not pressure.

Step 2: Teach What a Loose Leash Means

This is the foundation of leash training.

  • Stand still with your dog on the leash

  • The moment the leash stays loose, reward your dog

  • If your dog pulls, don’t move forward

Your dog learns quickly that pulling doesn’t get them anywhere, but staying close does.

Step 3: Start Walking — One Step at a Time

Once your dog understands that a loose leash is good, add movement.

  • Take one or two steps forward

  • If the leash stays loose, reward

  • If your dog pulls, stop walking immediately

  • Wait until your dog comes back toward you or the leash relaxes

At first, progress may feel slow. That’s normal. These early moments are where real learning happens.

Step 4: Use a Simple Walking Cue

Choose a short phrase like:

  • “Let’s go”

  • “Walk”

  • “With me”

Say the cue just before you start walking. Over time, your dog will learn that the cue means walking calmly beside you.

Step 5: Practice in Low-Distraction Areas First

Start in places where your dog can succeed.

  1. Inside your home

  2. Backyard or driveway

  3. Quiet sidewalk

  4. Busier streets or parks

If your dog starts pulling again in a new place, go back a step. That’s not failure — it’s part of the process.

How to Stop Pulling on the Leash

If your dog pulls:

  • Stop walking immediately

  • Do not yank the leash

  • Wait until the leash loosens

  • Reward calm behavior

Another helpful technique is changing direction. When your dog pulls, calmly turn and walk the other way. This teaches them to pay attention to where you’re going.

Common Leash Training Problems (and Solutions)

My dog wants to sniff everything

Sniffing is normal. Allow sniffing as a reward, but only when the leash is loose. If your dog pulls to reach a smell, stop and wait.

My dog ignores treats outside

Use better treats. Plain kibble often isn’t enough outdoors. Try small pieces of chicken, cheese, or something your dog rarely gets.

My dog hates the harness

Introduce it slowly. Let your dog wear it for short periods at home with treats and praise. Never force it on.

My dog is older — is it too late?

No. Adult dogs can absolutely learn leash manners. It may take more patience, but the process is the same.

How Long Should Leash Training Take?

Short sessions work best.

  • 5–15 minutes at a time

  • Once or twice daily

  • End sessions on a positive note

Consistency matters more than duration.

Mistakes to Avoid

  • Using leash jerks or punishment

  • Letting your dog pull “just this once”

  • Training only when you’re in a hurry

  • Starting in busy areas too soon

  • Expecting perfect behavior immediately

Leash training is a skill, not a switch.

Final Thoughts

Leash training is one of the best investments you can make in your dog’s life. A dog that walks calmly on a leash is safer, happier, and easier to live with. Progress may feel slow at first, but small improvements add up quickly when you stay consistent.

If you focus on clear communication, patience, and positive reinforcement, your dog will learn — and walks will become something you both look forward to.